Want to get your updates out to media? Here’s how you can save the hassle and manage it all with Fuseworks (with News distribution add-on only).
▶ Watch: How do I put out a media release? (4 mins)
▶ Watch: Common questions – Loading your media release (2 mins)
You can distribute updates either from within Fuseworks, or via your email (handy if you need to get a message out quickly, while you’re on the road).
Sending updates from within Fuseworks
Step 1 – Click to expand ‘Send news’ on the left-hand navigation and click ‘Add media release’.

Step 2 – Enter all the information for your press release:
Headline – The headline goes in the grey bar at the top. It’s a required field so it’s highlighted in red. When you start typing a handy character counter on the right will let you know how long your headline is – we recommend a maximum of 60 characters.

Embargo – If you want to send an embargoed release tick the ‘Embargo’ box and enter the date and time you want the embargo to lapse. The embargo will be pre-populated with 11pm on today’s date.

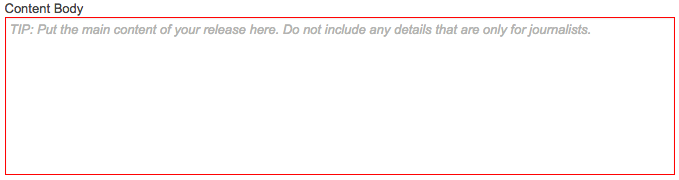
Content body – Enter the content of your media release here. The ‘Content body’ should only contain information that is for publication. ‘END’ is automatically inserted between the ‘Content body’ and the ‘Content footer’ to separate the fields in the email that’s sent out.
Content footer – The content footer will be automatically pre-populated with the contact details from your profile in Fuseworks – you can update your profile details anytime. You can also add other information that is only for journalists and not for publication, such as a related media opportunity, or additional contacts.


Step 3 – If you have images or documents you want to include with your media release you can attach them. Click the ‘Add attachment’ link and find the file you want to attach. If you’re attaching an image file (e.g .jpg, .png or .gif) you can enter a caption.

Step 4 – Click ‘Create article’ to save your media release. The button only appears after you’ve entered the required fields highlighted in red – the headline and the content body.

Step 5 – Once you’ve saved your the content of your media release, you’re ready to send it out. A green bar will appear under the headline at the top. Click on the ‘Distribute or schedule now’ link.

Step 6 – Check or update the details in the ‘Distribute news’ overlay.
Edit release subject – This will form the subject line of the email. It is automatically pre-populated with the headline of your media release, but you can change this (it won’t change your headline).

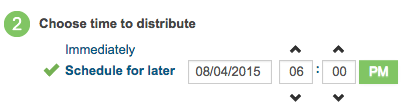
Choose time to distribute – The default, ‘Immediately’ is ticked to have your release go out straight away. You can change this and choose a specific time by clicking ‘Schedule for later’ and entering a time and date.
Choose distribution lists – You can add distribution lists by starting to type in the name of the list, the matching lists will appear in the drop down for you to select from.

Add additional email recipients – You can also enter adhoc email addresses to receive the release. This can be really handy if there’s someone you wouldn’t normally send media releases to, but need to as a one-off.

Select template – You can personalise your media release by adding an image to the top. Choose the template you want to use from the drop down. Here’s how to create a template.

Step 7 – Click ‘Send’ or ‘Schedule’ and you’re done. You’ll be emailed a copy at the same time so you know when it’s gone out.

Here’s how the email will look:

Each news distribution sent via Fuseworks has three associated email addresses:
- From: set to yourorganisation@fuseworks.nz, to maximise delivery rates
- Reply to: set to the user’s email address, so that any replies go directly to you
- Return-path: is an internal system email address that means that Fuseworks will receive any automatic bounce messages and can update lists for you accordingly.
Once you’ve completed the steps above the green bar under your headline will update. If you’ve scheduled the release to send later you’ll have a link to ‘View scheduled distribution/s’ so you can check or edit the details.

If the release has been sent you’ll have a link to ‘View log’ so you can see which lists it was sent to and when, as well as a link to ‘Distribute or schedule now’ incase you need to send it to an additional distribution list or issue a correction.

Sending updates via your email
Each distribution list has its own email address – which can only be used by Fuseworks users.
First you need to log into Fuseworks to grab the email address/es for the distribution list/s you want to use.
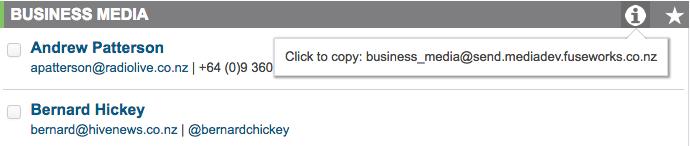
Step 1 – Click to expand ‘Send news’ on the left-hand navigation and click ‘Distribution lists’.
Step 2 – Open the distribution list/s you’ll want to use, then click the ‘i’ symbol, on the right hand side of the grey bar at the top. The email address for that list will be copied into your computer’s clipboard.
Step 3 – Add the copied email address to the address book of your preferred email program.
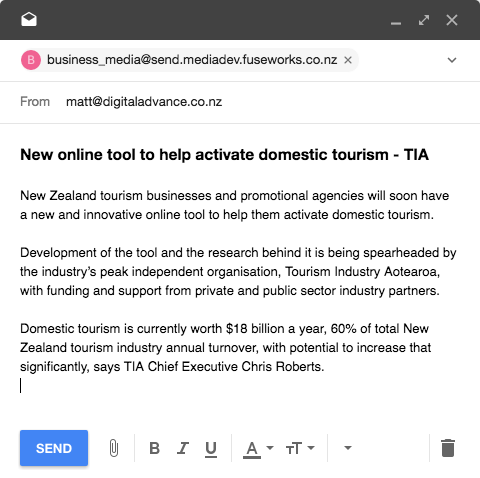
Step 4 – Create a new email in the normal way, with the content of your media update.
Important things to note:
- The email can only be sent from the address that is associated with your Fuseworks user account (for security).
- Put the headline of the release into the subject line of the email.
- Put the content of the update into the body field of the email.
- Add the required distribution list email addresses to the ‘To’ field.
- Media updates submitted this way can’t be scheduled for later.
- You can add attachments (eg: photos), however, if you add a DOC or PDF file to your email, Fuseworks will automatically extract the text from the attachment – and that will become the body text of your update.
Step 5 – Once your update is ready to go, send your email.
Step 6 – Fuseworks will send you a confirmation email, which you need to reply to, before the distribution will go out. This is also a good time to double check that the content of your update is correct.
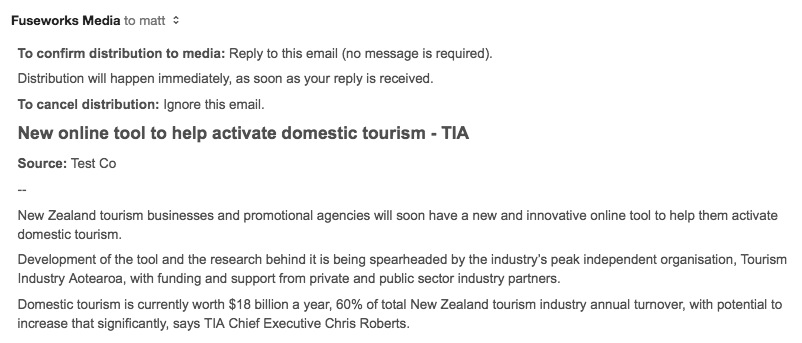
Step 7 – Reply to the confirmation email (the content of your confirmation email is ignored). The distribution will happen immediately.
You must be logged in to post a comment.