Get unlimited reports emailed automatically to you and your team (Media, Reports and Tools only). Choose from our range of preset options or create your own custom schedule for any combination of frequency or set time you need. You can also add reports to your Report Centre so people can subscribe and unsubscribe to reports as they choose.
For more advanced options for pulling longer-term reports from your folders, check out the ad-hoc report builder.
Step 1 – Click to expand ‘Reports’ on the left-hand navigation and click ‘Scheduled reports’.

Step 2 – Click ‘Create scheduled report’ in the grey bar at the bottom.

Step 3 – Select the options you want from the ‘Create report’ overlay.
Format – Click on the format you want to get the report in, a green tick will show you which one is selected. Depending on your choice the options below will update.
- HTML reports appear in the body of the email so are smartphone and tablet friendly and can be edited.
- PDF reports are a print friendly format that are delivered as an attachment.
- CSV reports give you the raw data and can be opened in any spreadsheet application for editing.

Schedule – Set a delivery schedule for your report. The default is a Monday – Friday daily report at 8am.
Choose the days you want to receive the reports. Reports will be sent on days that are green and won’t be sent on days that are grey.

Then choose the frequency you want to receive the report from the drop down. There’s 5-minutely, hourly, 3-hourly, 4-hourly, 6-hourly reports or you can specify other times with ‘Set Times’.

Add an additional schedule – You can also have different frequency reports sent on different days. This can be really handy if you want to get regular updates throughout the day during the week, but only need one or two updates on the weekends. Click ‘+ add additional schedule’ and select the days and frequency you want the other reports.

Office hours only – For reports sent on a frequency (5-minutely to 6-hourly) you can choose to only receive reports within the office hours you’ve specified. You won’t miss anything because you’ll get a catch-up report with everything since your last report.

Sections – Enter the name of the folder you want to report on, start typing and select it from the drop down.

Choose report options – Click to add and remove the sections you want/don’t want included in the report, a green tick will show you which ones are selected.
Choosing from the wide range of report options lets you tailor reports to their different purposes. Here’s a summary of each of the different sections you can choose to include in your reports.
- HTML and PDF report options

- CSV report options

Choose email options:
- Select template – You can have a logo or image at the top of your report. Choose the one you want from the drop down. Here’s how to create a template.

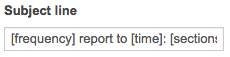
- Subject line – You can go with the default subject line or you can enter your own. Get fancy and insert clever dynamic content for things such as [frequency], [time] and [section].
- Footer – You can go with the default footer or you can enter your own. You can make use of the dynamic fields to include your [name] and [org].

Add to Reports Centre – You can choose to add a report to your organisation’s Report Centre so people can subscribe and unsubscribe as needed. Click on ‘My organisation’, a green tick will show you it’s selected. Enter a ‘Name’ and ‘Description’ for the report (optional) – this will appear in the Report Centre so people can decide which reports they want to subscribe to.

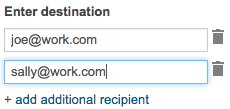
Enter destination – Click ‘+ add additional recipient’ and enter the first email address you want the report to be sent to. Repeat for any additional report recipients.
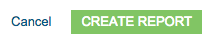
Step 4 – Click the ‘Create report’ button. It will be added to the list of your reports on the ‘Scheduled’ tab.
You must be logged in to post a comment.